|
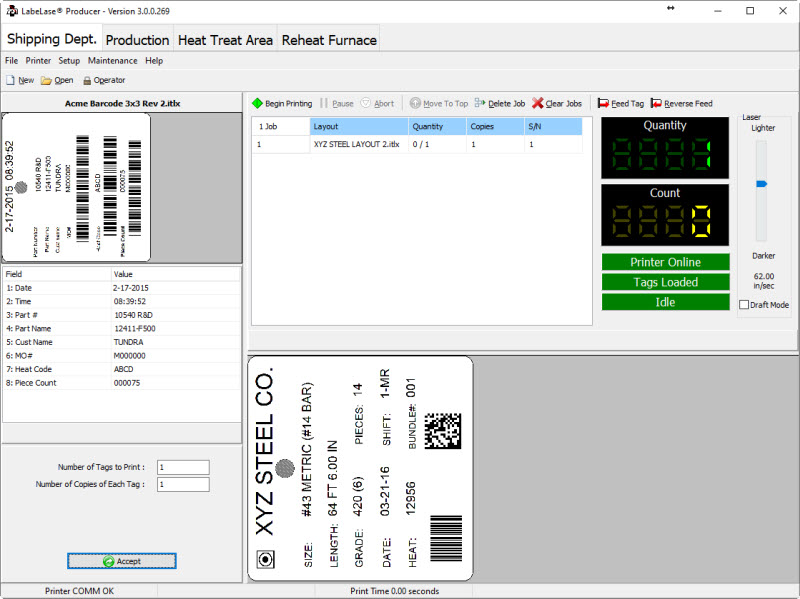
The program's main form is the primary interface for the operator to open a tag layout, enter data, and print tags. The form appears as shown in the example below. |
|
The Main form is divided into multiple sections, each providing specific operational capabilities. Each section is described below. |
Printer Tabs
The printer tabs are located at the top of the main form and are used to switch between multiple printers connected to the computer. Each tab has its own printer interface screen that allows you to interact with the associated printer. In this example there are four tabs corresponding to four printers. Each tab is labeled with a name that is assigned in the Connected Printers dialog. Note that if only one printer is configured, then the tabs will not be shown and the interface will look exactly like it did in Producer V2.x. |
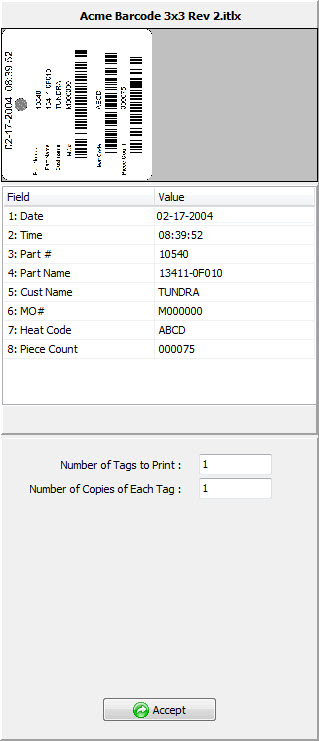
Data Entry
When a layout file is opened using File / Open or the Open tool, the layout is displayed at the top of the panel. Just below the image of the tag layout is the Operator Data Entry table. This table is created by the layout designer and contains the variable data fields that can be entered and/or edited by the operator. Each data field consists of a field name or prompt on the left, and a value that can be modified. Some data entry fields present a list of choices for the operator. The inclusion of choices and their values is determined by the layout designer when the layout is created. Under the Operator Data Entry table is a list of entries that the operator can modify to set various features of the print job. These include the number of tags to print, copy count for each tag, starting serial number, etc. Note that not all entry fields will be visible as it is up to the layout designer to determine which fields are appropriate for the application. At the bottom of the Data Entry panel is a single button labeled Accept. Once all of the data fields are correctly entered, clicking the Accept button will create a job and enter it into the Job Queue. |
Job Control
The Job Control panel shows the list of jobs that are in the queue and allows the operator to control the order jobs are printed. It also provides controls for various aspects of the printer. Begin Printing - Start printing the next job in the queue. The job at the top of the list is always the active job. Pause - Stop printing jobs after completing the current tag. Abort - Stop printing immediately. The tag being printed will not finish and will not be counted. Move To Top - Move the selected job to the top of the list. This command is only available when there is more than one job in the queue and the printer is not printing. Delete Job - Remove the selected job from the Job Queue. Clear Jobs - Delete all jobs from the Job Queue Feed Tag - Feed one tag though the printer. Reverse Feed - Reverse feed one tag. Beneath the job controls is a list of jobs in the queue. The jobs can be moved to change the order in which they are executed. To move a job, simply drag and drop it in the new position. Note that you cannot drag a job to the top of the list if the printer is busy printing. To the right of the job list are status fields. The quantity of tags to be printed in the active job is shown, and below that is the current count. Below the quantity and count indicators are fields showing the status of the printer. To the right of the status fields is a slider that allows the operator to change the speed of the laser and thus the darkness of the printed tag. Below the darkness slider is a checkbox that will put the printer into Draft Mode. When in draft mode, the printer will print at half resolution in each dimension. Any job can be edited by double clicking the entry in the Job Queue, which will open the Print Job Editor. Note that you cannot modify the active (first) job while the printer is printing. Context Menu - Right click any entry in the job queue to access the context menu.
|
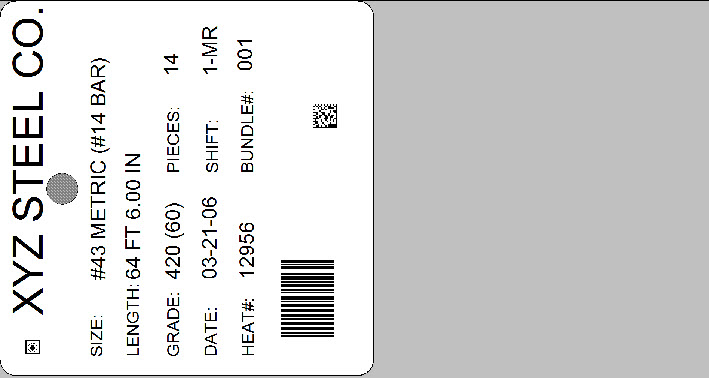
Printed Image
At the bottom right of the program window is an image of the currently printing tag. This image always reflects the tag that is at the top of the print queue. Please note that the quality of the image display may be less than what is actually printed on the tag due to loss of resolution when scaling a very large tag image to fit on the display.
|
Status Bar
The status bar at the bottom of the program window shows the printer communications status, host communications status and print time. The far right status panel will show error messages as they happen.
|
Main Menu and Toolbar Overview
|
File Menu
New - Create a new blank layout. Selecting this command will launch the LabeLase® Designer program. Supervisor mode is required to run the program. Open - Open a tag layout file that is stored on the computer's hard disk or network drive. Supervisor - Puts the program into Supervisor mode of operation, enabling the more advanced features. Note that a password will be required to enable this mode. Once the program is in the supervisor mode of operation, this menu item will be renamed to "Operator" providing a method of switching back to operator mode. Exit - Exit the program. Between the Supervisor menu choice and the Exit choice is a list of up to 4 layout filenames. The program keeps track of the last four layout files loaded by the operator and allows them to be re-loaded quickly by clicking on the filename.
|
Printer Menu
Accept - Accept the data entered by the operator into the Data Entry fields and enter it as a Print Job into the Job Queue. Begin Printing - Begin printing tags, starting with the first job in the Job Queue. Abort - Abort the current tag printing cycle. This menu item is only available if the program is currently printing a tag. Feed Tag - Feed one tag to the break-off position. Reverse Feed - Reverse feed a tag back into the printer. Unload - Unload all tags from the printer. Note that all of the Printer menu items except for Unload has an associated function key. Pressing the function key is the same as clicking the item in the menu.
|
Setup Menu
Layout Designer - Activate the LabeLase® Designer program, which allows the supervisor to create and/or edit tag layout files. You can also activate this form by double clicking the tag layout image. Printer Configuration - Open the Printer Configuration form. This form allows you to specify the details about the tag printer such as its resolution in both axes, stepper motor rates, laser burn intensity, etc. Host Communications - Open the Host Communications form, which allows the supervisor to configure the communications link between the tag printer and the customer's information system (host.) Service - This menu item will allows the supervisor to configure and control the LabeLase® Service. The service is a special version of Producer that runs in the background without a user interface. Selecting this command will launch a separate program for configuring the service. This service configuration program requires elevated rights to execute and you may be asked to enter a password for a Windows account with administrator privileges. Settings - This menu item will open the Settings Editor to allow you to configure various program settings. Language - This menu item presents choices for language packs installed with the software. Selecting a new language will cause the interface to update immediately
|
Maintenance Menu
The Maintenance Menu is only available when in the Supervisor mode of operation and provides several features that aid in the setup of the printer and diagnosis of any problems you may encounter. Note that under most circumstances, it will not be necessary to access these functions. If you must use these functions, do so only under the direct supervision of factory trained personnel. Calibrate / Motor - This menu item will activate the Motor Calibration form, which allows the supervisor to calibrate the printer's stepper motor. Calibrate / Laser - This menu item will activate the Laser Calibration form, which allows the supervisor to calibrate the printer's laser. Jog Motor - This menu item will activate the Jog Stepper Motor form, which allows the supervisor to jog the printer's motor (the tag feed drive-train.) View Printer I/O - This menu item will activate the I/O Monitor form, which allows the supervisor to view the Input and Output signals of the tag printer. View Event Log - Open the program's event log in Notepad. View Print Log - Open the log of printed jobs in Notepad.
|
Help Menu
Register - This menu item allows you to enter the printer registration code you received when you registered your printer online at the InfoSight web site. About - This menu item will activate the About form, which shows important information about the program including version number, printer firmware version, PassCode, etc. When contacting the factory for assistance, you may be asked to access the About form to provide details about your specific configuration.
|
Toolbar
|

 The
Data Entry area of the main form allows the operator to provide
data for the tag layout that may not be available until it is time
to print the tags.
The
Data Entry area of the main form allows the operator to provide
data for the tag layout that may not be available until it is time
to print the tags.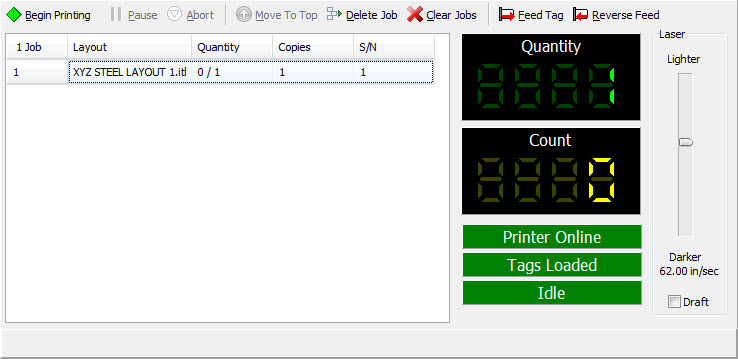
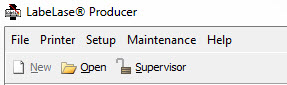 At
the top of the form is the program's main menu and tool bar.
Commands are available to open layout files, control the printer,
configure the program and perform maintenance operations.
Note that the Setup and Maintenance menus are available only to
Supervisor personnel.
At
the top of the form is the program's main menu and tool bar.
Commands are available to open layout files, control the printer,
configure the program and perform maintenance operations.
Note that the Setup and Maintenance menus are available only to
Supervisor personnel. The
File Menu provides access to the program functions that deal with
loading tag layout files for printing, as well as for accessing
other special program operations.
The
File Menu provides access to the program functions that deal with
loading tag layout files for printing, as well as for accessing
other special program operations.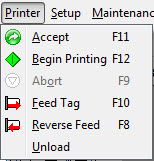 The
Printer Menu gives the operator the ability to control various
aspects of the printer.
The
Printer Menu gives the operator the ability to control various
aspects of the printer.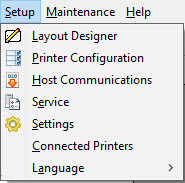 The
Setup Menu is only available in the Supervisor mode of operation
and provides several features for configuring the operation of the
tag printer.
The
Setup Menu is only available in the Supervisor mode of operation
and provides several features for configuring the operation of the
tag printer.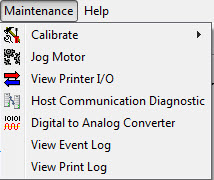
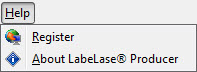 The
Help Menu provides access to the program's built-in help facility,
as well as to information about the program itself.
The
Help Menu provides access to the program's built-in help facility,
as well as to information about the program itself.