LabeLase® Producer
Setup Menu
|
|
Use caution when using these commands to avoid causing configuration problems with the printer. |
Layout
Designer
Open LabeLase® Designer, which allows the supervisor to create and/or edit tag layout files. You can also activate this form by double clicking the layout image located above the Operator Data Entry table. LabeLase® Designer is a separate program that works closely with Producer to provide an interactive tool to quickly and easily create layout patterns. View the documentation for LabeLase® Designer.
|
Printer
Configuration
The Printer Configuration dialog allows you to modify the parameters that describe the configuration of the printer. Each model of LabeLase® printer has different characteristics and the software must be configured to match. Settings are stored by Producer based on the printer model and serial number. At the top of the Printer Configuration dialog you can see your printer model and serial number. The dialog has four groups, each corresponding to a specific aspect of the printer's configuration: Stepper Motor, Mirror / Galvanometer, Laser and Printer Configuration. Each of these is discussed in detail below. Stepper Motor
Stepper Resolution - This field specifies the resolution of the tag feed stepper motor in inches or millimeters per step. You must enter a value that is compatible with your printer model. A typical value for the model LL1000 is 0.00295 inches per step. Microsteps / Column - This field specifies the number of microsteps of the stepper motor per column of the image. A typical value for a tag printer would be 1. Rotary printer models may have a different setting. Contact the factory to determine the proper setting for your printer. Minimum Frequency - This field specifies the minimum or starting frequency of the stepper motor when making big moves such as when feeding or reversing from the tear-off location. The value is specified in Hertz. Maximum Frequency - This field specifies the maximum or top frequency of the stepper motor when making big moves such as when feeding or reversing from the tear-off location. The value is specified in Hertz. Reversing Takeup - This field specifies an additional number of steps that the tag feed motor must make when changing directions. This feature is used to compensate for backlash in the motor gearing.
|
Mirror
Galvanometer
Mirror Resolution - This field specifies the resolution of the mirror galvanometer in inches or millimeters per step. You must enter a value that is compatible with your printer model. A typical value for the model LL1000 tag printer is 0.00295 inches per step. Galvo Step Size - This field specifies the number of DAC steps to apply to move the galvanometer mirror by one pixel in the vertical dimension. You must enter a number that matches your tag printer’s configuration. Galvo Start Margin - This field specifies the number of pixels in the margin at the start of each column of image data. Galvo End Margin - This field specifies the number of pixels in the margin at the end of each column of image data. Galvo Home Delay - This field specifies the time, in milliseconds, that the galvo must delay when returning to the home position. Galvo Offset - This field specifies the vertical distance in inches (mm) to offset the galvo/laser from the center of its scan. This setting effectively shifts the printed image +/- about the center of the tag. The field is usually set to 0 for the model 1000 printer, but positive or negative values may be entered to fine-tune vertical alignment of the burned image with respect to the tag. Vector Offset - This field specifies the vertical
distance in inches (mm) to offset vector printing in relation to raster
printing. This field is used to align vector printing in
reality with the lines on the screen.
|
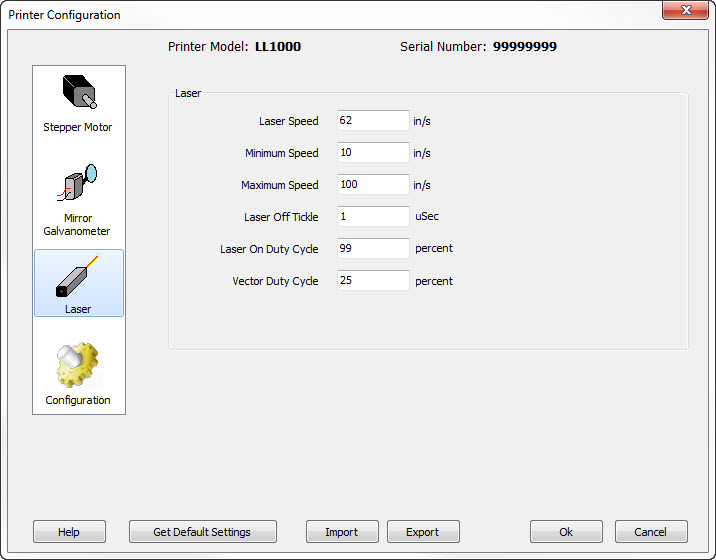
Laser
Laser Speed - This field affects the “blackness” of the image produced by the tag printer’s laser by specifying the speed at which the laser is moved across the tag surface. The lower the setting for this field, the blacker the image will be. Note that print speed is affected by this setting: the lower the setting, the slower the print speed. Minimum Speed - New to Version 1.30. This field, along with the maximum speed (below), is used to set the range of the "Darkness" track bar on the main window. When the track bar is all the way to the right (darker), then this speed will be selected. Maximum Speed - New to Version 1.30. This field, along with the minimum speed (above), is used to set the range of the "Darkness" track bar on the main window. When the track bar is all the way to the left (lighter), then this speed will be selected. Laser Off Tickle - This field specifies the amount of “tickle” that will be used to excite the laser when it is off. By increasing this value, the laser will switch faster from an off to on state. Setting this value too high will cause the tag coating to blacken in areas that are supposed to be white. Laser On Duty Cycle - This field specifies the amount of time the laser is on for any given pixel, expressed as a duty cycle (percentage.) Vector Duty Cycle - This field specifies the amount of time the laser is on when printing vector fields, expressed as a duty cycle (percentage.) This setting only applies to specific models of InfoSight printers that are designated as "vector" printers. This includes the LL1000V model printer.
|
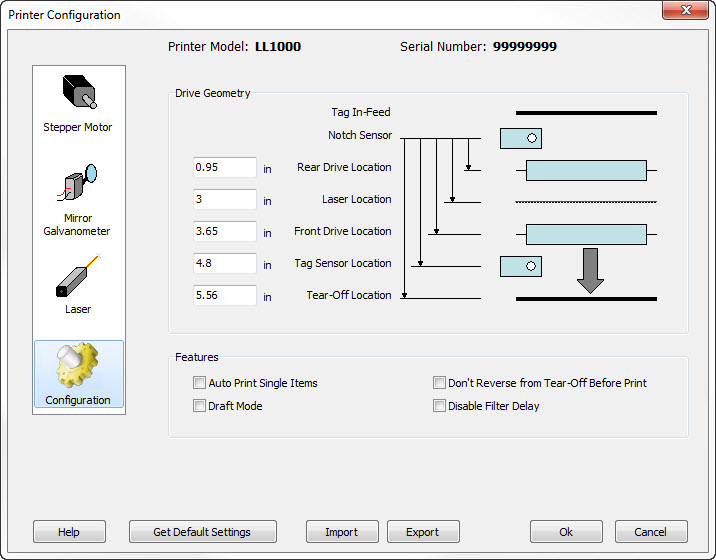
Configuration
Note that the printer configuration settings may vary somewhat between the various LabeLase® printer models. The fields discussed below are for the LL1000 family of printers. Rear Drive Location - This field specifies the distance from the notch sensor to the rear drive roller. Laser Location - This field specifies the distance in inches or millimeters from the notch sensor to the position where the laser burns the image. Front Drive Location - This field specifies the distance from the notch sensor to the front drive roller. Tag Sense Location - This fields specifies the distance from the notch sensor to the tag sensor. Tearoff Location - This field specifies the distance in inches or millimeters from the notch sensor to the position where the tag is to be torn or broken off. Auto Print Single Items - Select this field to enable the printer to automatically begin printing when a tag is inserted into the slot. Draft Mode - This checkbox allows you to specify that you wish to run the printer in a lower resolution draft mode. When you check this box, the Stepper Resolution, Mirror Resolution, Microsteps / Column, Galvo Step Size and Laser Speed settings will be adjusted appropriately for you. Note that when in draft mode, barcode fields with odd scale settings will be distorted. Don't Reverse from Tear-Off Before Print - This checkbox will prevent the printer from reversing the tag material from the tear-off position before beginning the next print cycle. This setting is only useful in certain specialized printing applications and should normally be turned off. Disable Filter Delay - This checkbox will disable the short delay used by the air filter when printing vector fields on special materials. Normally, the air filter needs to be turned on several seconds prior to printing a layout containing vector fields. This allows air flow to be fully up-to-speed before printing begins. However, in special circumstances, you may remove this delay. Contact the factory for instructions.
|
|
Get Default Settings - Get the default settings for all printer configuration fields. The default settings will be the most recently saved defaults if the defaults have been set, or the factor settings if not. Export - Export the current settings as shown in this dialog to a file. You will be queried for the name of the file, which will have the extension .INI, and can be saved anywhere you choose. Once a file is saved, it can be recalled later using the Import button. Import - Import the settings that were previously saved using the Export button. You will be queried for the folder and name of the file, which has a .INI extension. The Export / Import functions make it easy to save different printer configurations and recall them as needed. This may be useful for backup purposes, or if different types of tag stock are used frequently. Click the Ok button to save your changes and have them sent to the printer. |
Host
Communications
Many printing applications require that the data printed on the tags come from another computer called a host. The host computer must be connected to the tag printing computer via some type of communications medium and using some type of communications protocol. The LabeLase Printer software allows you to connect to another computer or network to facilitate the download of data to the printer. The Host Communications dialog allows you to specify the communications medium along with the necessary protocols to establish the communications link. This dialog is organized into groups of related settings. The first group, Connection, allows you to specify and configure the connection type and to select the protocol.
|
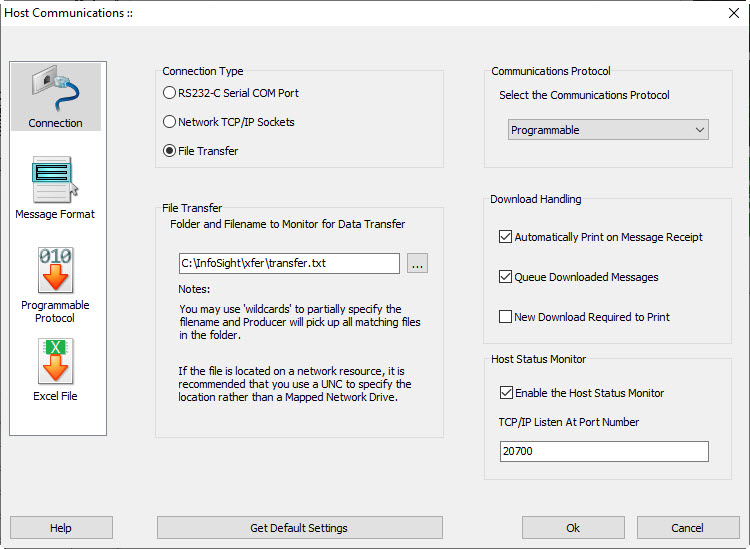
Connection
Connection Type - This radio group allows you to select the physical medium to be used to connect the tag printer to the host. You can select from RS232-C serial COM port, a network connection using TCP/IP sockets, or a file transfer method. Your choice for this setting will enable the Serial Port settings, Network Configuration settings, or File Transfer settings respectively.
Communications Protocol - This drop-down list allows you to choose a specific application layer protocol for host communications. If using the Network connection type, then the selected protocol will ride on top of TCP/IP. If you select the Programmable protocol, an additional group of settings must be entered. Automatically Print on Message Receipt - This checkbox enables the automatic printing of tags upon receipt of the host download data. Queue Downloaded Messages - This checkbox enables the queuing of data received from the host computer. When not checked, only one print job will be allowed in the job queue. Receipt of a new download will clear the queue prior to entering the new data.. New Download Required to Print - This checkbox enables the requirement that a new message be received from the host in order to print. When checked, you will not be able to print until a new message is received. Status Monitor - Status monitor settings were added in V3.1.0. The status monitor allows an external device to connect to Producer and receive asynchronous status messages. Details of the status messages can be found in Status Monitor section of Host Communications. Enable Host Status Monitor - When checked, Producer will listen for connections on a TCP port defined below. Note that enabling this feature may require changes to your firewall settings. Contact your network administrator for assistance. TCP/IP Listen at Port Number - Defines the TCP port where Producer will listen for connections to the status monitor. The port number must be between the 1024 and 49151. The default value is 20700. Note that if you are controlling more than one printer with a single Producer installation you must choose a different TCP port number for each printer. For example, if you have 3 printers connected, you can use ports 20700, 20701 and 20702.
|
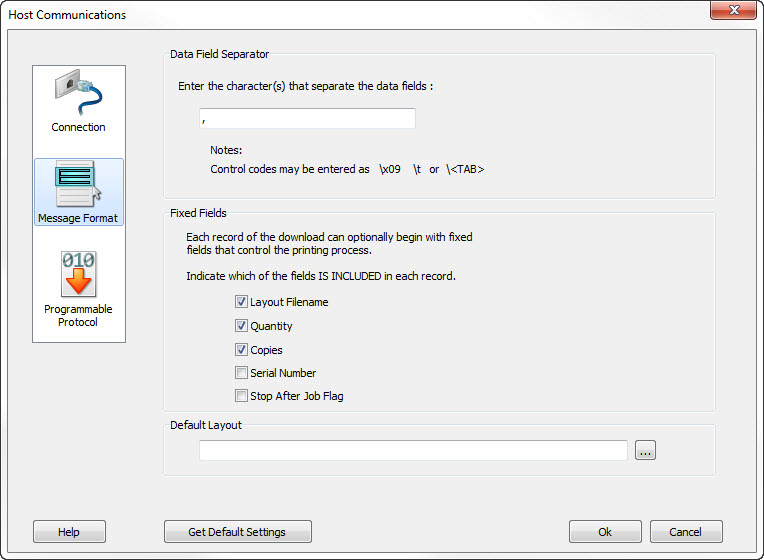
Message Format
Data Field Separator - This field is used to specify the character that is to be used to separate the fields in the downloaded message. The default is to use the comma character. However, it may be necessary to include the comma as part of the text to be printed. If this is the case, change the data separator to another character that is guaranteed not to be part of the data text. Binary data may be included in the separator as follows: \x09 selects the TAB character. This may also be specified as \t or \<TAB>. Control codes can be specified in this way using the standard ASCII name for the codes. Binary values above 128 may be specified using the hexadecimal value as in the first example. Fixed Fields - The downloaded data may optionally begin with up to three fixed fields that specify the layout filename, quantity and copy count. You can include these fields by checking the corresponding "include" checkbox in setup. Note that each fixed field is individually include/excluded. Note also that the logic for these settings is reversed from previous versions of Producer. In version 1.x the checked box indicated that the field was not included. In versions 2 and above the check indicates inclusion. Default Layout - If the downloaded data does not include the layout filename, you have the option of specifying a default layout to be used for all downloaded data. If you specify the path and file name of a layout file, that file will be used to print all downloaed data.
|
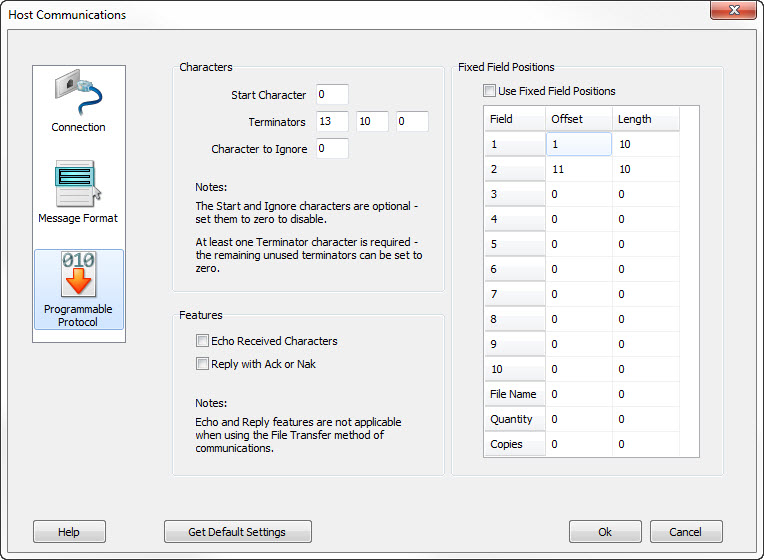
Programmable
Protocol
The Programmable protocol is not really a protocol as much as it is a way to define a simple communications mechanism for data transfer between Producer and another device that cannot or does not handle the other protocols available. Using the protocol’s settings, you can configure it to match a simple download of data from another device. Start Character - This field specifies a unique starting character value (in decimal) that can be used to trigger the receipt of information. The character cannot appear at any other time in the download. If a unique start character is not available, set this field to zero. Terminators - These three fields can be used to specify up to three characters that will terminate the download. If only one terminator is needed, set the second and third to zero. For example, if the download is terminated by carriage return (CR) and line feed (LF), set the first field to 13 (decimal equivalent of CR), the second field to 10 (decimal equivalent of LF) and the third field to zero. Character to Ignore - This field can be used to specify a character (in decimal) that is to be ignored wherever it may appear in the download. Echo Received Characters - This checkbox is used to enable the echo of all received characters back to the host computer. Reply with Ack or Nak - This checkbox is used to enable a reply back to the host with either an ACK character if the message was received without error, or with a NAK character if the message overflowed the receiver’s buffer. Use Fixed Field Positions - This checkbox is used to enable the parsing of the data fields using fixed field locations. If checked, you must supply the character offset and field lengths for up to 10 text fields. The data will be extracted using these rules. If this field is not checked, then the data will be expected in a variable length, delimited format called the Standard Message Format. The delimiter must be the Data Field Separator as specified in the Connection Type tab. Fixed Field Positions - This table is used to specify the fixed fields to be used to extract the data. This table is only used if the Use Fixed Field Positions checkbox is checked. You must specify the field’s starting character offset (the first character received is 1) and the number of characters occupied by the field.
|
Service
In some applications it may be undesirable to have the printer's users interact with Producer's graphical interface. In these situations, it would be nice if Producer could somehow run "in the background" and be available to print tags at all times, even if a user is not logged into the computer. To satisfy this need, there is a separate version of Producer that has been designed to run as a Windows Service. LabeLase® Service is a program that runs as a Windows service that can control the InfoSight LabeLase® tag printers. This program executes as a background service and provides an interface between your computer (the host) and the tag printer. It performs the basic tasks of the LabeLase® Producer software without the graphical user interface. Before running the service, you must run the graphical version LabeLase® Producer and configure its operation. Specifically, you must configure the printer, create and edit your tag layouts, configure host communications, etc. You basically must get Producer running exactly as you want it using the graphical version before running the service version. The background service will use the settings from the graphical Producer when performing its operations. If you are not familiar with what a Windows Service is, or with how to install and configure one, you may want to contact your system administrator for help. Service Configuration
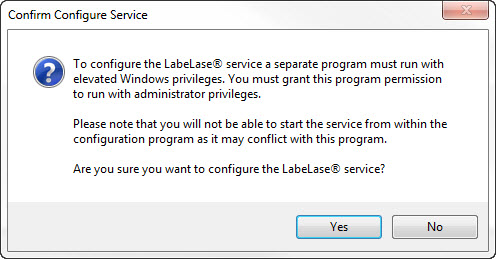
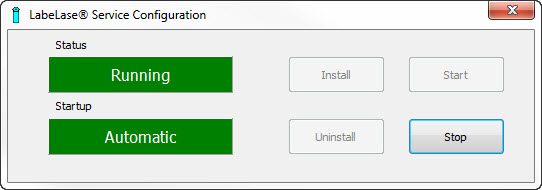
When you select Setup / Service, you will be asked to confirm your intention to configure the LabeLase® service.
The Service Configuration utility is a separate program and will need to have elevated privileges to configure the service. Windows will ask for permission to elevate privileges and you may need to enter a password for an administrator account. Since the service cannot be running at the same time as the graphical version of Producer, you will not be able to start the service while the graphical producer is running. However it is perfectly Ok to install or uninstall the service while Producer is running. Installation
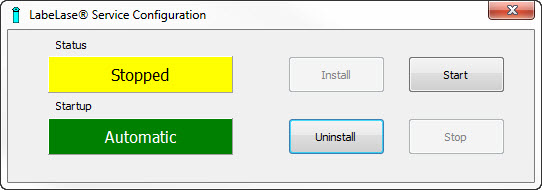
Click Install to register the service version of Producer with the Windows Service Control Manager. The service will be configured to startup automatically when the computer starts. After installation, the service will be stopped.
Do not start the service at this time. The service cannot run at the same time as the graphical Producer because they will conflict with each other. Once the service is installed and you close the Service Configuration program, Producer will ask you if you want to start the service after you close the Producer program. If you answer yes, when you close the graphical Producer the service will be started. Uninstall
Click Uninstall to remove the service from the Windows Service Control Manager. Start
/ Stop
You should only attempt to start the service from this Configuration Utility if you run the utility as a stand-alone program rather than launching it from within Producer. If Producer is not running, then you may launch the Configuration Utility from Windows using Start / All Programs / InfoSight / LabeLase Producer / LabeLase Service Configuration
Once the service is installed and running, starting the graphical version of Producer will automatically stop the service version since the two cannot run simultaneously. If the service was running when the graphical Producer started, then when you close the graphical Producer the service will be automatically restarted. In this way, the two programs cannot conflict with each other. Service Login
Requirements
Versions of Producer prior to 2.x required the service to login as a specific user, because the program's settings were stored in the Windows Registry under a specific local user account. It was necessary to configure Producer under a specific user account and then manually configure the service to log in with that same account. Producer versions 2.x and later no longer store the program's settings in the Registry, instead it stores the settings in a file for all users of the computer. Because of this change, it is no longer necessary to have the service log in with a specific user account. The Configuration Utility will configure the service to log in using the standard Local System account.
|
Settings
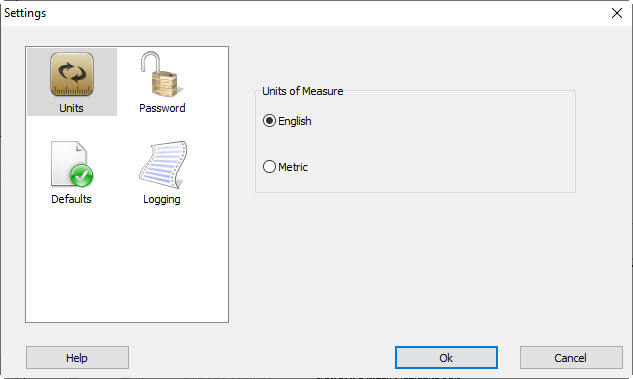
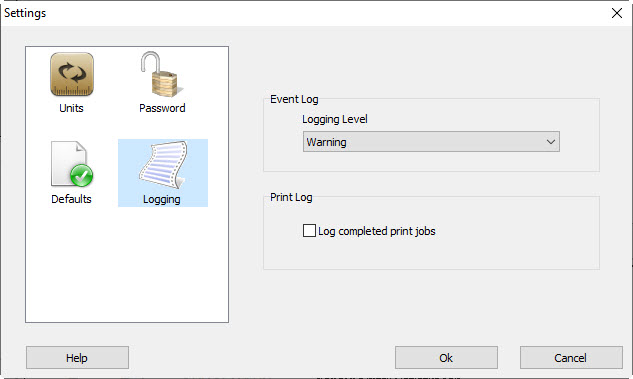
The Settings Dialog allows you to configure settings that control the operation of the Producer program. Settings that can be changed include: units of measure, supervisor password, data logging and defaults.
|
Units
Select the units of measure. If you select English, measurements will be in inches. If Metric is selected, measurements will be in millimeters.
|
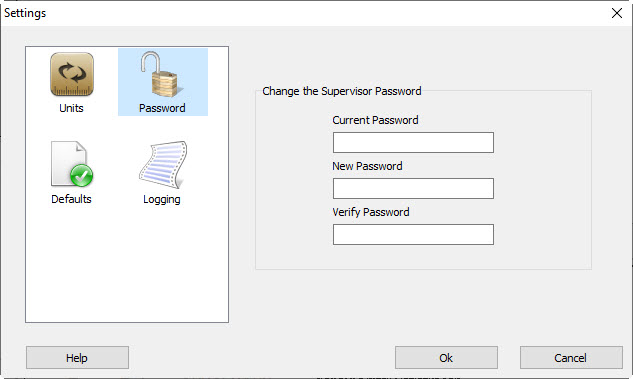
Password
Change the Supervisor password. Note that when the software is first installed the password will be blank. We recommend that you create a password to keep unauthorized personnel from accessing and modifying your layout designs.
|
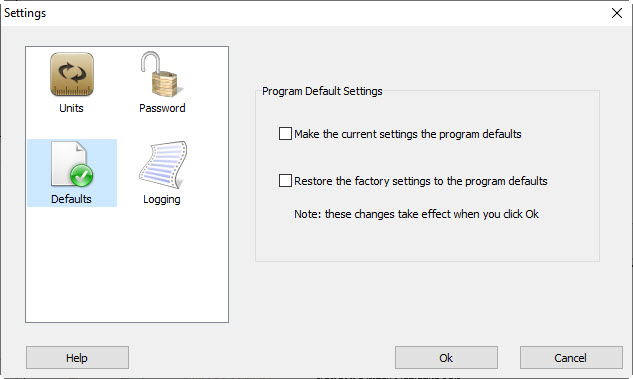
Defaults
The Defaults group provides a way for you to manage the program's default settings. Make the current settings the program defaults - Checking this box and clicking the Ok button will take the current program settings and make them the "default". Restore the factory settings to the program defaults - Checking this box and clicking the Ok button will change the default settings back to their original factory values. As noted on the screen, these checkboxes only take effect when you click the Ok button.
|
Logging
LabeLase® Producer can create two types of data logs. The Event Log contains a list of program events to aid in diagnosing problems, while the Print Log lists all print jobs processed by the program. Event Log Logging Level - This setting specifies the amount of detail to be put into the event log. The lower the setting, the less detail. Higher values provide more detail as follows:
Turning the level up may be helpful in diagnosing any problems that you may be having with Producer or the service. We recommend that the level be placed at Critical or Error for normal operation to prevent the log file from getting too large and affecting the program's performance. Note that you need to stop and restart the service for the new logging level to be recognized. Print Log Log completed print jobs - When checked, Producer will add an entry to the print log for each job that is completed. Note that individual print operations within the job are not logged. For example, if a print job contains a quantity of 10 tags to print, only one entry will be made in the log after that job has completed.
|
Connected
Printers
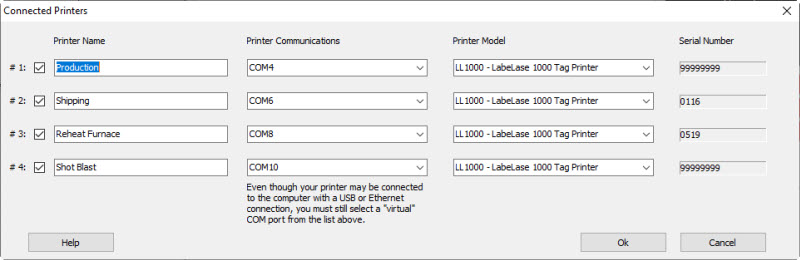
The Connected Printers menu item allows you to configure connections for up to four LabeLase® printers. Printer Name
Check the box on the left to enable a printer. Each printer connected to this instance of Producer requires a name. The name can be as simple as "Printer 1" or something more meaningful such as "Heat Treat". Use a meaningful name to help you remember which printer you are interacting with at any given time. Printer
Communications
Producer connects to each printer using a "COM" port. Even if you connected your printer using USB or Ethernet, a "virtual" COM port was created and Producer uses this virtual port to talk to the printer. For every printer configured with a name on this form, you must select a unique COM port. You cannot use the same port to talk to more than one printer. If you try to select the same COM port for more than one printer, or you don't select a port for a printer that has an assigned name, you will receive an error message when you click the OK button. If you don't see the port associated with your printer, you may have incorrectly installed the drivers for that port, or it may not be configured correctly. Use the Windows Device Manager (USB) or the COM Port Redirector (Ethernet) to fix any issues with the port. Printer Model
The printer model identifies the type of printer connected to Producer. Normally the model number can be left unassigned and Producer will fill it in automatically after it first establishes communications to the printer. You can manually set or change the model here if you wish (for example if you evaluating the Producer software without having an actual printer to connect to) but be aware that your setting will be overwritten by Producer when it contacts the printer. Serial Number
Each printer has a serial number assigned to it. Once Producer has contact the printer the serial number for that printer will appear in this dialog. You can use the serial number field to help you identify which printer is connected. You cannot edit or modify the serial number. Click the OK button to save your settings. Producer will reconfigure the user interface as needed to match your settings. It will create a tab at the top of the main screen showing each of the printer names as you named them. Clicking one of those tabs switches the interface to use that printer. Note: If you only configure one printer then you won't see the tabs at the top of the main screen because there won't be any need to switch.
|
Language
The Language menu allows you to select the language you want to use for the program user interface. One or more language packs may have been installed with Producer and these will appear as sub-items to the Lanauge menu. Selecting a new lanauge causes the user interface to update immediately.
|
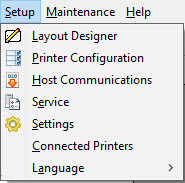 The
Setup Menu is only available in the Supervisor mode of operation and provides
several features for configuring the operation of the program and the tag
printer.
The
Setup Menu is only available in the Supervisor mode of operation and provides
several features for configuring the operation of the program and the tag
printer. 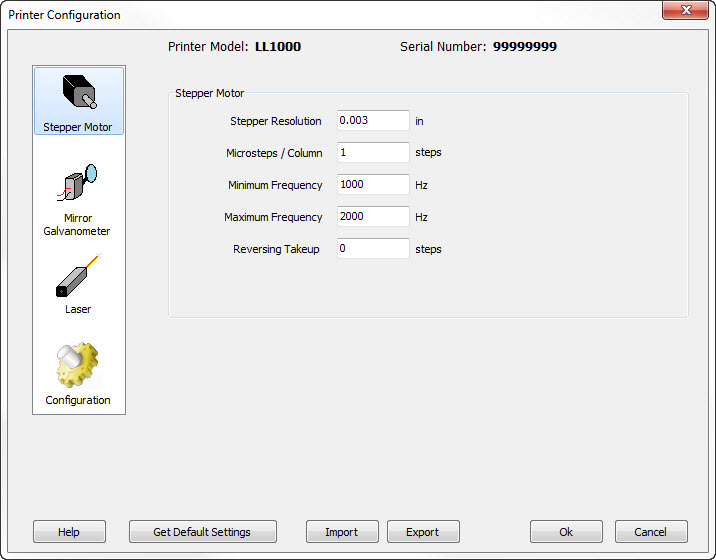

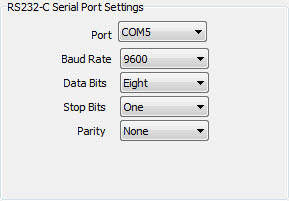 RS232-C
Serial Port Settings- Choose the serial port, baud rate, number of data
and stop bits, and parity to match the settings on the host. Note that the
COM port used must be an unused port on the computer.
RS232-C
Serial Port Settings- Choose the serial port, baud rate, number of data
and stop bits, and parity to match the settings on the host. Note that the
COM port used must be an unused port on the computer.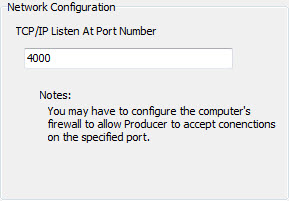 Network
Configuration - When connecting to the host via a network, the TCP/IP
protocols are used. The Producer will act as a server and will listen at a
specific TCP port number for connection requests from the host. You must
specify the port number at which the Producer is to listen. Note that
Network
Configuration - When connecting to the host via a network, the TCP/IP
protocols are used. The Producer will act as a server and will listen at a
specific TCP port number for connection requests from the host. You must
specify the port number at which the Producer is to listen. Note that