|
This section provides information about each command in the file menu. |
NewFile / New allows you to easily begin the process of creating a new layout. If you are not in the "supervisor" mode, you will be prompted to enter the password to continue. The LabeLase® Designer program will open and allow you to create a new layout.
|
OpenWhen you select the Open option from the File menu (or click the open button on the main form) the Open dialog will appear. This dialog allows you to select a file to open. When you select a layout file from the list, a preview image will be shown in the right part of the dialog to aid you in selecting the proper file. You may select any layout file that may reside in any folder on your hard drive or in a network folder (assuming your PC is connected to a network that allows file sharing.) The Open dialog allows you to select files of the following types:
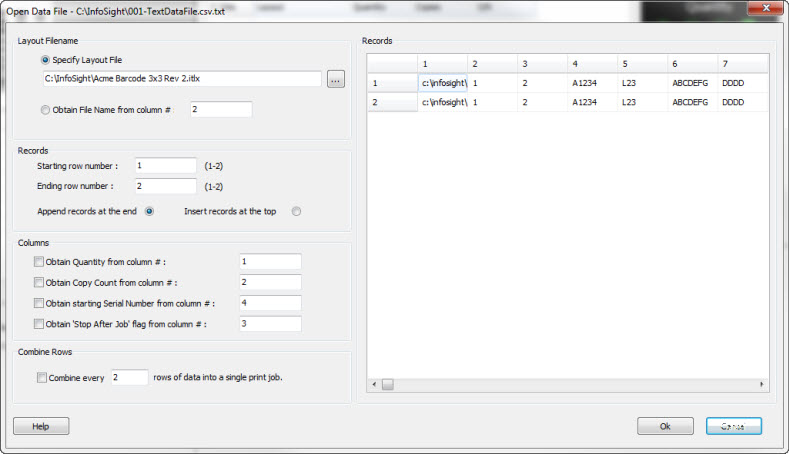
Opening a layout file, either standard or classic, will immediately open the file for editing and printing. Opening a data file will result in the Open Data File dialog to allow you to further refine how the data will be used. Open Data FileOpening either a Text or Excel file will activate the Open Data File dialog, which will allow you to specify how the data in the file will be applied to a layout file. An example of this dialog is shown below.
To process the records in the data file you must specify how the data in the file is organized and how it is to be processed. Layout Filename The records in the data file are applied to a layout file. The layout file that will receive the data can be specified in one of two ways: Specify Layout File - Select this option and enter the full path and filename for the layout file, or click the browse button and locate the file on the file system. The specific layout file will receive the data from each record in the file. Obtain File Name from column # - Select this option and enter the column number from the data file where the layout file is specified. Each record must have a column containing the full path and file name of the layout file to receive the data. Each record may have a different layout file if necessary and the appropriate layout will be loaded when the job is processed. Note that however the layout file is specified, the full path and file name are required. Records The data file consists of one or more records. In a delimited flat-file each line of text is considered to be a record. In an Excel spreadsheet each row of the spreadsheet is a record. Each record in the file will become a job in the Job Queue unless you are combining rows (see below.) Starting row number - Enter the row number from the data file to use as the first record to print. Row numbers are numbered beginning with one. Ending row number - Enter the last row number to extract from the data file. Append records at the end - Check this radio button if you want the new records to be appended to the end of the print job queue. These new records will be printed after any existing records. Insert records at the top - Check this radio button if you want the new records inserted at the top of the print job queue. These new records will be printed before any existing records. Columns Each record in the data file is organized into a sequence of fields or columns. In a delimited flat-file each field is separated by a comma or tab character. In an Excel spreadsheet each column corresponds to a field of data. Columns or fields of data are applied to the Operator Data Entry fields of the layout. At the same time, you may optionally specify that certain columns also contain specific data that controls the printing process. Obtain Quantity from column # - Check the box and enter the column number, numbered from one, from which to obtain the quantity of tags to be printed. Obtain Copy Count from column # - Check the box and enter the column number, numbered from one, from which to obtain the number of duplicate tags to be printed. The total number of tags printed is the Quantity times the Copy Count. Obtain the starting Serial Number from column # - Check the box and enter the column number, numbered from one, from which to obtain the starting serial number. Obtain 'Stop After Job ' flag from column # - Check the box and enter the column number, numbered from one, from which to obtain the flag indicating that the printing process should stop after that job is completed. The column that contains the "stop after job" flag must contain one of the following:
Combine Rows Combine every X rows of data into a single print job - Check the box and enter the number of rows to be combined into a single job. This feature is most useful for printers that can print more than one physical tag at a time, such as the LL1000P and JM410 model printers. This feature allows you to have individual rows of data in the data file, but have them combined into one print job to mark multiple tags simultaneously. Records The individual records from the data file are presented in a grid format. Each cell in the grid is fully editable to allow you to perform last minute changes to the data contents before creating the print jobs. Each row will become an individual print job when the Ok button is clicked, unless the Combine Rows feature is enabled. When the form closes, the print jobs will be entered into the queue.
|
Open Excel FileNew in version 2.2.0 - File / Open Excel File allows you to easily find and open an Excel spreadsheet file. Once selected, the file will open with the Open Data File dialog as described above.
|
Supervisor / OperatorWhen the program is in the operator mode, access to certain program features is disabled, and the menu item will read "Supervisor". Selecting the Supervisor menu item will activate the password entry form to allow the supervisor to enter the password that activates supervisor mode.
Once the correct password is entered, the program will enter the "Supervisor" mode of operation and all functions will be enabled. To go back to the operator mode, pull down the File menu and notice that "Supervisor" has been replaced with "Operator". No password is required to switch back to operator mode.
|
Recent FilesBetween the Supervisor and Exit options is a list of up to ten layout file names. This list consists of the most recently opened files and allows you to quickly reopen a layout file. Click the file name in the list to open the layout.
|
ExitExit the program. Note that if the service version of Producer was running when the graphical version started (and was subsequently stopped), the service will be restarted automatically. |
 The File Menu provides access to the
program features that deal with loading layout files for printing, as well as for accessing other special program operations.
The File Menu provides access to the
program features that deal with loading layout files for printing, as well as for accessing other special program operations.
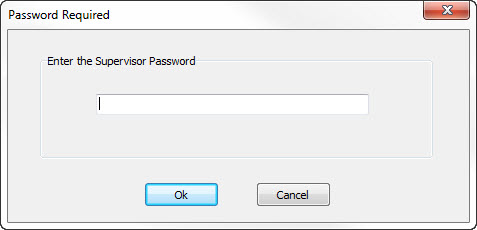 The supervisor must enter the correct
password and then press the OK button. If the incorrect password is entered, an error will be displayed.
The supervisor must enter the correct
password and then press the OK button. If the incorrect password is entered, an error will be displayed.