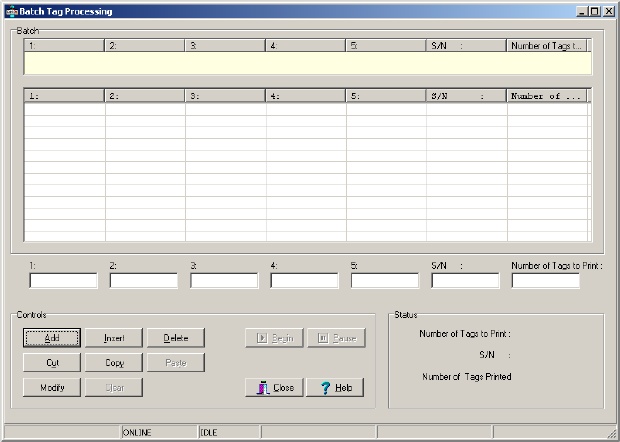
The top half of the Batch window shows a list of the batch queue. This first item in the list is the next batch to be printed. The batch list consists of columns showing up to 5 variable text fields. The serial number field and the quantity to print are also shown. Each of the 5 variable text fields corresponds to the first 5 operator data entry fields in the layout.
Below the batch list are data entry fields for each column. This is where you enter the information that goes into each batch. The leftmost two columns are for the serial number and quantity required respectively.

Control buttons are provided to allow you to manipulate the batch list.
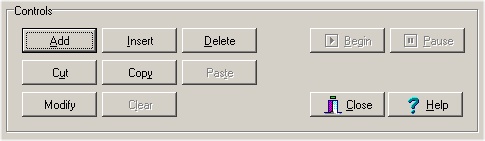
Add - This button is used to add a new batch to the end of the list. Prior to clicking this button, you must enter the data into the data entry fields. Once the data has been entered, click the Add button to have the data added to the list as a new batch.
Insert - This button is used to add a new batch to the list at a location other than the end of the list. Prior to clicking this button, you must enter data into the data entry fields. Also, you must select a location in the list where the new data is to be inserted. Select the location by clicking on the first field of the desired entry. Once an insertion point has been selected in this manner, click the Insert button to add the batch to the list at this point.
Delete - This button is used to delete the selected batch from the list. Before you click the Delete button, you must select the batch to delete.
Cut - This button is used to delete the selected batch from the list and place it onto the batch window�s �clipboard�. Once a batch is added to the clipboard, it can be pasted into the list in any location. This is useful for moving batches within the list.
Copy - This button is used to copy the selected batch to the clipboard. Once copied to the clipboard, it can be pasted into the list in any location.
Paste - This button can be used to add a batch to the list that has been previously Cut or Copied to the clipboard. First select the insertion point by highlighting the desired location. Click on the Paste button to add the clipboard batch to the list. Note that a batch can be pasted to the list as many times as needed.
Modify - This button can be used to modify a batch that is already in the list. Prior to clicking the Modify button, you must first transfer the batch information to the edit fields by double clicking the batch�s first column. The batch data is then copied to the edit fields. Make the necessary changes to the information in the edit fields and then click the Modify button. The data will be copied from the edit fields back to the selected batch in the list.
Clear - This button is used to clear the entire batch list.
Begin - This button is used to begin the batch printing process. There must be at least one batch in the list before this button can be clicked. Once started, the first batch in the list is moved up to the Current Batch field at the top of the window. The batch printing process begins. As each batch is completed, the next batch is removed from the batch list and printed. Once the last batch has been printed, the process stops.
Pause - This button is used to stop the batch printing process. If there are tags remaining to be printed in the Current Batch, then that batch is transferred back to the top position of the batch list. Click the Begin button again to resume printing.
|