|
The Arc Text tool is used to add a circular text field to the layout. A layout may have an unlimited number of arc text fields. To add a text field to the layout, follow these steps: |
Once the field is added to the layout, you use the Properties Editor to change the field's properties.
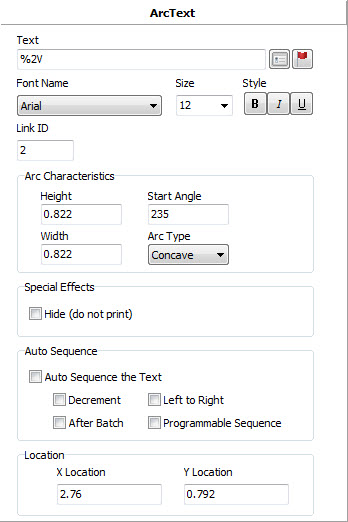
Each arc text field is defined by several pieces of information that you must supply. This information includes: Text This field defines the text to be printed. You may enter the text directly in this field and press the Enter key, or to perform more advanced editing you can click the ellipsis button to the right of the text to open the Text Field Editor. Note that the text can contain certain special flags for automatic data insertion. Font Select the name of the font for this field. Size Enter the point size for the text. Bold Enable (true) bold style for the text. Italic Enable (true) italic style. Underline Enable (true) underline style. ID The ID must contain a number that is a unique identifier for this text field. Barcode fields use this number to link to the text. Height The height of the rectangular region surrounding the arc text. Ths, along with the Width property defines the size and type of circle that will contain the arc text. If the height and width are equal, the text will be placed in a circle. If the height and width differ, the text will be placed on an ellipse. Width The width of the rectangular region surrounding the arc text. Start Angle The starting angle of the first character of the text, measured in degrees on the cartesian coordinate system. Arc Style The type of arc, which defines the way the text is rendered.
X The X coordinate of the lower left corner of the text. This field was initially filled in for you based on where you clicked the mouse. Y The Y coordinate of the lower left corner of the text. This field was initially filled in for you based on where you clicked the mouse. Hidden You may hide (true) or display (false) the text. Hidden text appears in the designer, but is not printed. Auto Sequence A text field can have its contents automatically sequenced by setting this property to true. When enabled, the following four fields control how the text is sequenced. Sequence Left to Right When enabled (true) the leftmost character sequences first, then to the right. Sequence Decrement When enabled (true) the text sequence decreases. When disabled (false) the text increases. Sequence After Batch When enabled (true) the text is sequenced after each batch. When disabled (false) the text is sequenced after each print cycle. Sequence Programmable Enable (true) the use of a programmable sequence of alpha-numeric characters. The actual sequence of characters is defined in the User Tables editor for the layout.
|
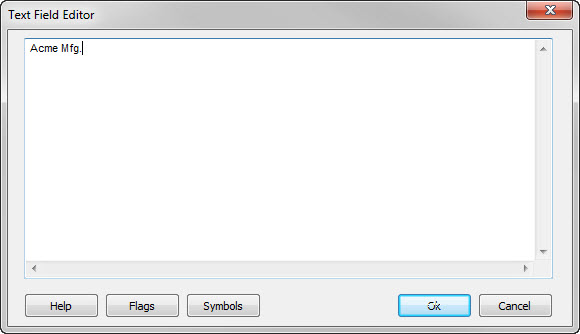
Text Field Editor
The Text Field Editor provides a more convenient way to enter the text. Text can be entered on multiple lines if desired. A button is provided to get help on the various special "flags" that automatically insert data into the text.
|
Message Flag Help
This help form allows you to interactively build the special flags and insert them into your text. Select the desired flag from the list on the left and enter any required information in the panel on the right. Note that some flags do not require additional information. The resulting flag and a sample of the associated data are displayed. When you are satisfied with the result, click the button "Insert Flag Into Text" and the flag will be added to your text at the insertion point. |
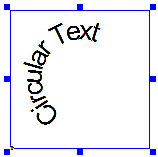
 Concave The text is readable from the center of the arc. Text placement
begins at the starting angle and proceeds clockwise around the arc.
Concave The text is readable from the center of the arc. Text placement
begins at the starting angle and proceeds clockwise around the arc.
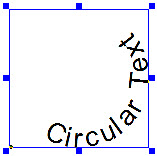
 Convex The text is readable from outside of the arc. Text placement
begins at the starting angle and proceeds counter-clockwise around the arc.
Convex The text is readable from outside of the arc. Text placement
begins at the starting angle and proceeds counter-clockwise around the arc.