|
If you are new to the LabeLase® Designer, here's a quick look at how to begin your first layout. The steps listed below are explained in separate procedures in LabeLase® Designer Help. Assuming you are in Supervisor Mode, the program will look something like shown below. 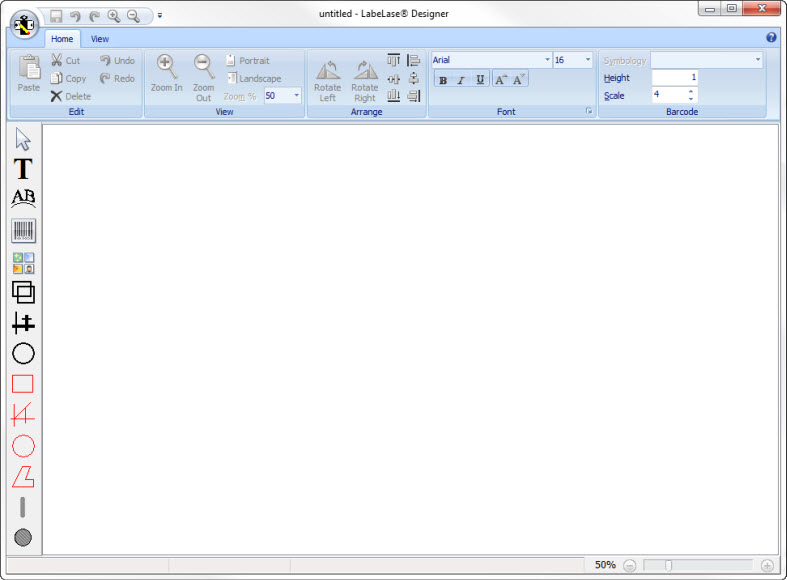 |
Creating a Blank LayoutThe first step is to create a blank layout. From the application menu shown below, select the New menu item.
When you click the "New" menu item, you will open a new layout editing tab with a blank layout ready to be edited as shown in the image below. 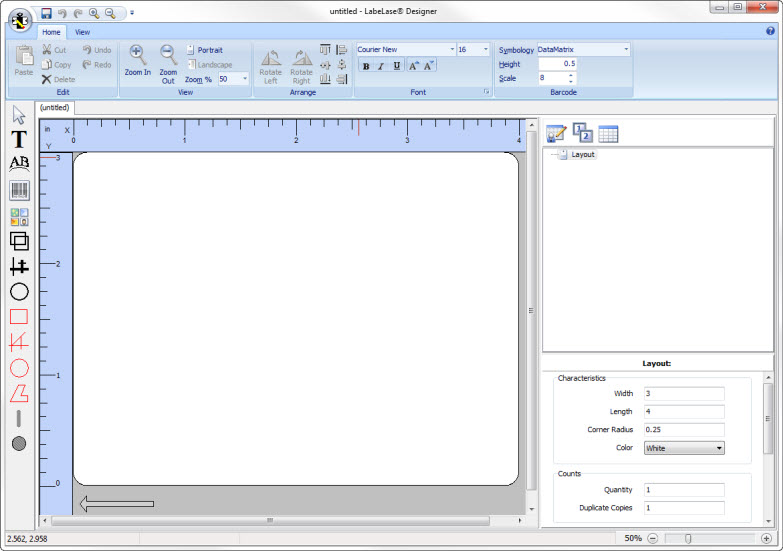
The image above shows the primary features of the layout editor. |
The Ribbon
The ribbon provides most of the commands to manipulate the layout features. This includes editing commands such as Cut, Copy, Paste and Delete, field rotation and alignment, text font, size and style, and barcode symbology. The ribbon also has commands to enable or disable features such as the layout grid, field anchors and so on.
|
Tool PaletteThe tool palette (a portion of which is shown here) contains the various tools used to add features to the layout. These include text, barcodes, graphic images, lines, boxes, ellipses, etc. Select a tool from the palette and click in the work area to create a field. Selecting a tool will deselect any other tool that may be active. Only one tool is active at a time. To cancel a tool selection, click on the "deselect tool", which is the pointer at the top of the palette. Note that after placing a field on the layout, the active tool will automatically be deselected. You must select a tool for each field you wish to add to the layout.
|
The Layout Field List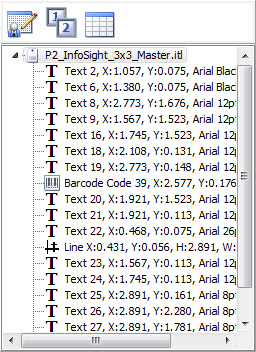
The layout list contains a list of fields in the layout, in the order in which they are drawn. Clicking on a field will select it in the work area and show its properties in the Properties Editor. Field order can be changed by dragging a field with the mouse and dropping it in its desired location. |
The Properties Editor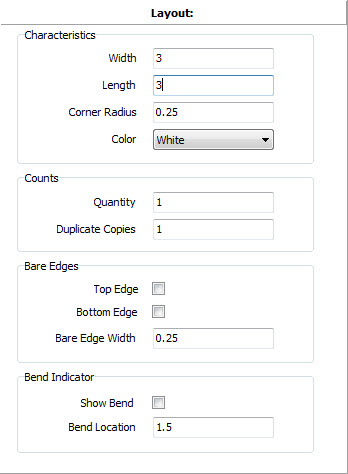
The properties editor allows you to change certain properties of the layout, or of a selected field. To change the properties of the layout, select the top-level item in the Layout Field List or click a blank area of the layout in the work area. To change the properties of a field, select the field either in the list or the work area. |
The Work Area The work area contains the fields within the layout. Fields can be selected by clicking on them. Multiple fields can be selected by holding down the Shift key on the keyboard and clicking the fields with the mouse.
|
Configuring the Layout GeometryWhen you created your blank layout, the size of the layout area defaulted to some value that may, or may not, be appropriate for your application. You can configure the geometry of the layout area by editing the corresponding fields in the Properties Editor, located in the lower right corner of the window.
Along with the edit length and width, you may, depending upon your printer model, be able to add features to your layout such as bare edges and bend lines. When editing a field in the properties editor, you must press either the Enter or Tab keys to commit the changes.
|
Adding Features to the LayoutUsing the tools on the toolbar located on the right side of the window, add the desired Text, Barcode, Graphics and other fields. Tools are also provided to add holes and slots to the layout. Holes and slots corresponding to real-world entities on the material you are marking make it easier to see the placement of fields. Note that you can undo and redo any changes you make to the layout as you are editing.
|
Saving Your LayoutYou should save your layout to disk so that you have a backup copy in case anything happens to the layout design. From the application menu, select the "Save " menu item. If this is the first time you have saved your layout, you will be prompted for a name and destination folder. |
