 |

LabeLase® Producer
|
|
LabeLase® Producer
|
Printing Tags from an Excel Spreadsheet |
| The XLTags form allows you to import lists of tag data from a
Microsoft Excel or CSV (comma separated variable) file. The
form then extracts the data from the various columns and associates it
with fields in the tag layout. One or more tags are then
printed for each row of data in the file.
|
|
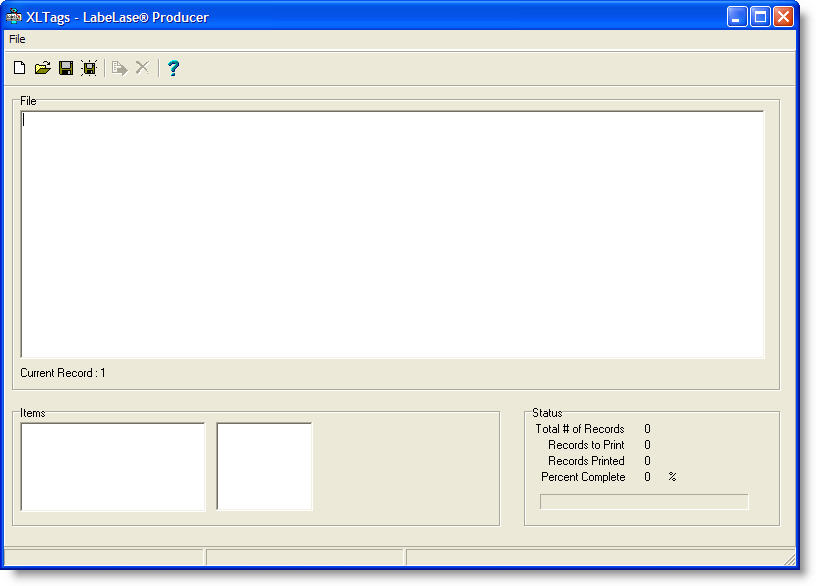
| Data Files Before you can send Excel file information to the printer, you must create a file containing the data to be printed. XLTags extracts information from this file and prints it one record at a time. XLTags can read files of two types: comma-delimited text files (preferred) and Microsoft Excel spreadsheet files. Comma-Delimited Text Files XLTags natively uses plain text files, where each line of text represents a tag to be printed. The fields on the tag are separated in the text file with a comma character. Every line of text in the file must contain the exact same number of fields. You may use any of several methods for creating this type of file including Notepad or another text editor (do not use Word or WordPad unless you save the file as plain text.) You can also create the file with Microsoft Excel and save it as comma-delimited CSV format as discussed below. The file extension for this type of file is .CSV or .TXT. Microsoft Excel Spreadsheet Files XLTags also has a limited ability to read Microsoft Excel spreadsheet (.XLS) files. The spreadsheet must be designed to use only a single workbook and must not include formulas, functions or any other non-text data. Each column in the spreadsheet represents a field of data, and each row represents a record (one tag.) If the spreadsheet contains special features, or is excessively large, XLTags may take a very long time to read it, or it may hang while trying. Because of this, we recommend that you save your spreadsheet as a CSV (comma-delimited) format. File Format Regardless of how you create the data file, its format is very important for XLTags to function properly. As previously stated, each line of text in the data file represents one tag and each field within that line represents a data to be printed. However, XLTags treats the first field within the record differently from the others. The LabeLase® printer can print an unlimited number of fields of text on a tag. Each field, also, has no limit on the number of characters it may contain. However, the tag geometry itself may place restrictions on the maximum number of characters for any given field and/or layout. It would be nice if the tag printer had the capability to take a long text field and break it up over several lines, performing word wrap as required to ensure that words are not split between lines. The tag printer itself is not capable of this, but fortunately XLTags is. The first field of a record can contain more characters than can fit on any one line of the tag layout. XLTags will automatically split the line into multiple lines, performing word wrap as needed, and print the tag. All fields after the first are sent as-is and must fit within the available real estate limitations. When designing your tag layout, you must create operator-entered text fields as the first "X" fields in the layout. The number of fields to reserve depends upon the maximum number of characters in the longest first field of the file. For example, if the longest first field in the text file is 75 characters and the tag layout will only accommodate at most 25 characters per line, then you must reserve the first three operator entered fields of the layout to hold the data. Each additional field in the file will occupy fields 4, 5, 6 etc. It may take some experimentation to determine the optimum tag layout for your data. Just be sure to use the longest first field in the data when determining the layout. Operation The top of the display is the program's main menu as well as a toolbar of most frequently used commands. Just below the toolbar is an area that shows the contents of the currently loaded file. Just below the file area is an indicator that shows the current record being processed. Note that the area showing the file information is editable so you can make changes to the data and then save these changes if desired. In fact, you could create the entire data file right in this editor and save it to disk. Below the file information is an area that shows each item's data as it is being processed. To the right of this is a display of the status of the job. Opening a Data File When you select the File menu, you will be presented with a menu as described below:
|
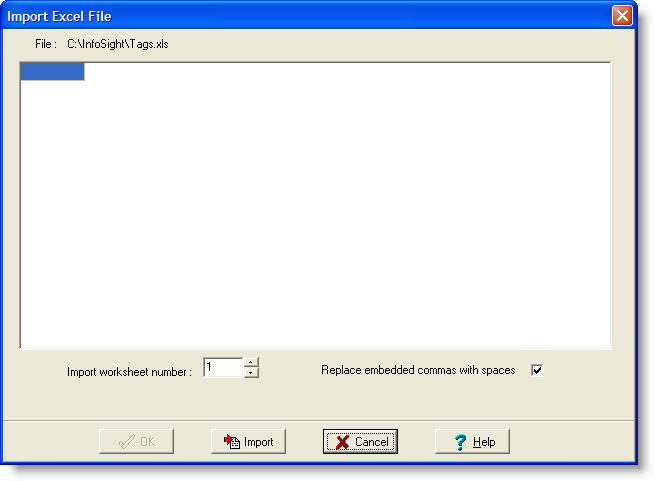
Excel File ImportExcel spreadsheet files cannot be used directly, so they must be imported into the program and converted to a comma separated file format. The Import Excel File dialog performs this operation.
|
 |
|
XLTags has a limited ability to read Microsoft Excel spreadsheet (.XLS) files. The spreadsheet must be designed to use only a single workbook and must not include formulas, functions or any other non-text data. Each column in the spreadsheet represents a field of data, and each row represents a record (one tag.)
|
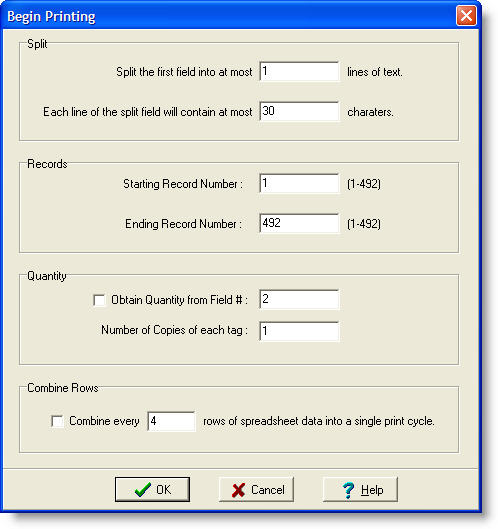
Printing Tags from the Spreadsheet
When you select the Begin command (or click the Begin button on the toolbar) a dialog form will appear that allows you to configure and begin the download process. |
 |
|
Split |
Copyright © 2010 InfoSight Corporation All Rights Reserved
InfoSight ® is a registered trademark of InfoSight Corporation
Excel ® is a registered trademark of Microsoft Corporation